Avocado Tuna Salad

Happy September! Who is ready for the Fall and getting back to a normal routine? I know I am and am very much looking for to my “12 Day Real Food Reboot” program that launches again Monday, September 16th! I love doing it with my clients because it allows me to get back to the basics of healthy eating and to cut out the foods that tend to cause a lot of inflammation. Plus, the benefits speak for themselves:

  • Increased energy
  • Weight loss
  • Improved skin + sleep
  • Better digestion
  • Reduced stress + anxiety
  • Learn how certain foods affect your body

If you’re exhausted from the summer and need to jump start your body, this is the program for YOU. If you sign up by Friday, September 6th, you can lock in the early bird special ($50 off the regular price!!!)

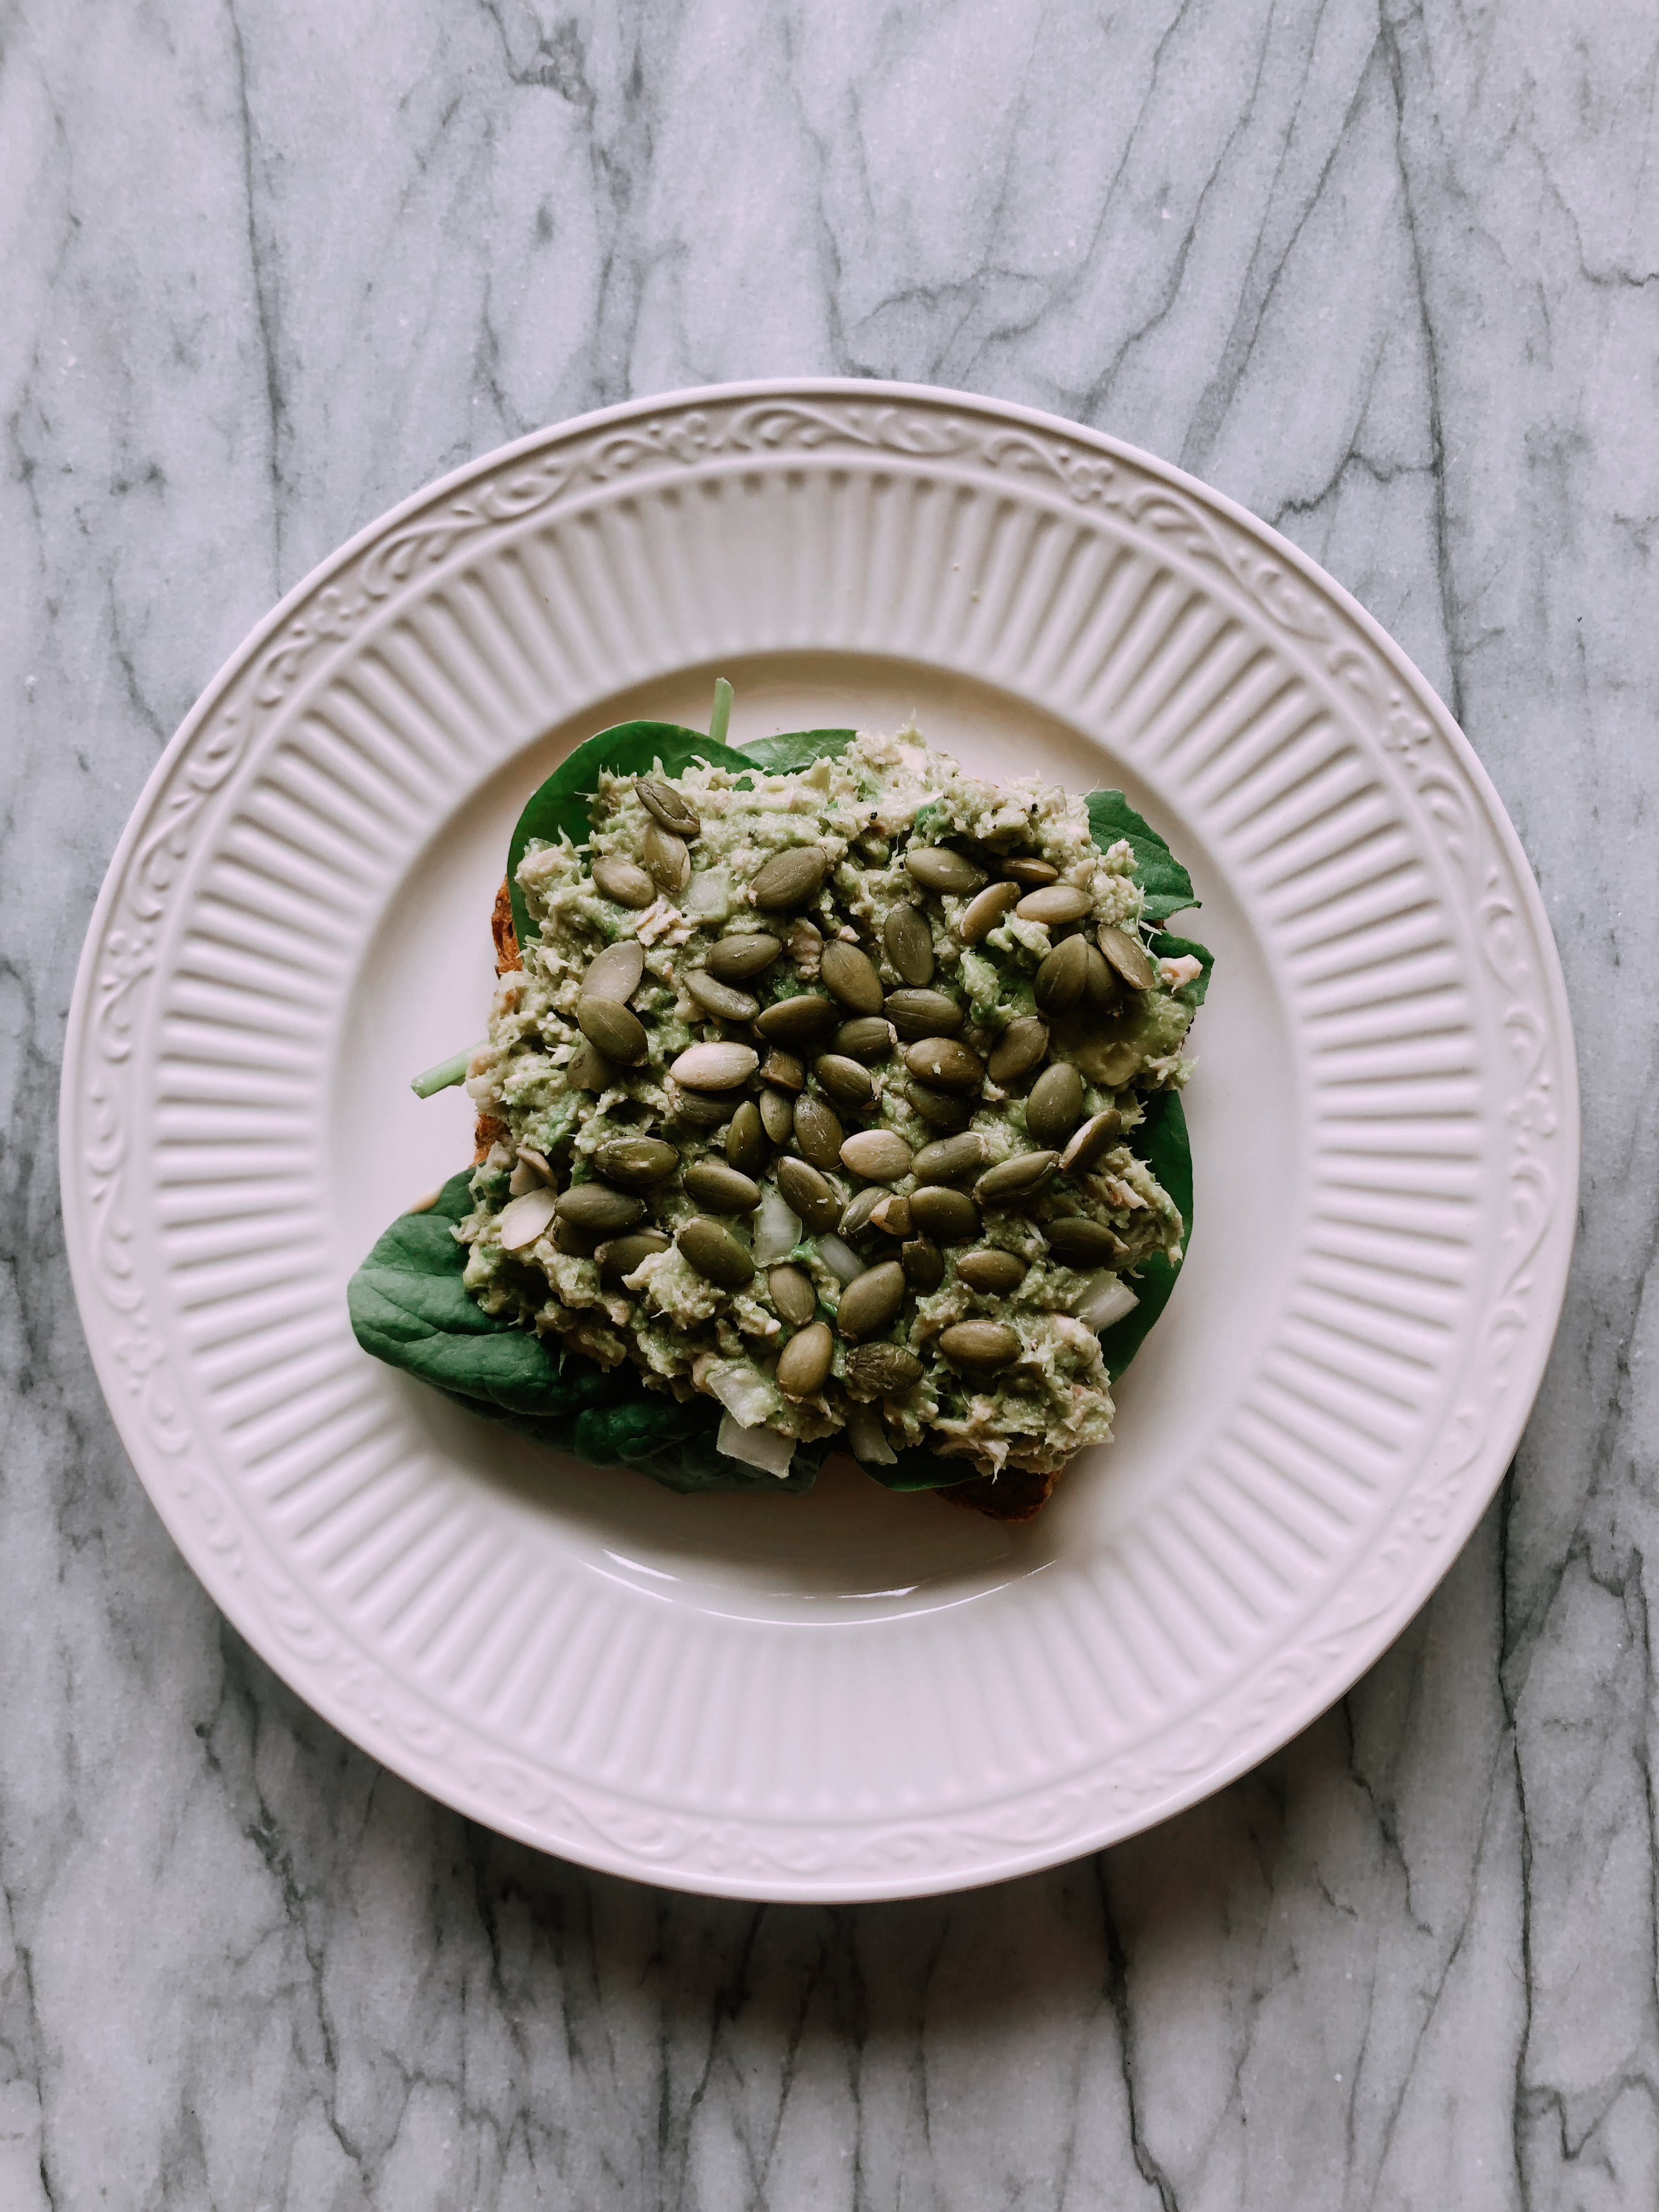
While this healthy tuna salad is not Reboot approved, it is a healthy alternative to your regular tuna fish salad with mayo. Like I’ve said before, I used to be a HUGE fan of chix salad but since I don’t eat meat anymore (just seafood and eggs), I’ve had to experiment a bit in the kitchen to create recipes that fill my chix salad void, haha. Instead of using mayo, I opted to use avocado and it makes this tuna salad so creamy and delicious. It’s perfect on Ezekiel bread, Mary’s Gone Crackers or lettuce wraps. Super simple because that’s what healthy living is all about 🙂

Avocado Tuna Salad
 
Prep time
Total time
 
Serves: 4
Ingredients
  • 1 can of tuna
  • 1 ripe avocado diced
  • 1 slice of yellow/white onion diced
  • ¼ of a lemon
  • S+P to taste
Instructions
  1. Open the can and do not drain -- just place contents into a bowl and break apart the tuna with a fork.
  2. Take the avocado to halve, dice and throw contents into the bowl.
  3. Peel a white or yellow onion and then just slice one ¼ inch wide slice off the onion. Then dice finely and throw into the bowl.
  4. Squeeze the lemon juice into the bowl and add pepper and sea salt to taste.
  5. Mix the contents of the bowl and taste test to see if you need to add anymore seasoning.
  6. I ate mine on Ezekiel bread with a drizzle of honey mustard, spinach leaves and pumpkin seeds on top for more nutrients. However, you can also throw on a salad or on lettuce wraps, eat with crackers or straight out of the bowl. Enjoy!


With Health + Happiness,
Jax

PS – Want a 3 Day Real Food Detox Guide to get detoxing now? Click here to get started!


Vegan English Muffin Pizzas

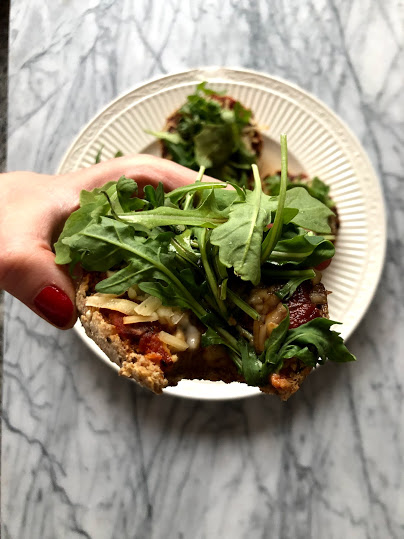
Did anyone else grow up making english muffin pizzas when there wasn’t any food in their parents house or make it as drunk food when they got home from the bar? I actually used to do this frequently with my little sister, Katie, whenever we were both home for the holidays or over the summer, haha. I obviously don’t make it as drunk food anymore, BUT recently I was craving it since I don’t really eat much pizza these days due to my dairy allergy. These are super easy to make + will leave you feeling satisfied, but without the guilt of regular pizza because it’s made with REAL FOOD. It also brought back all of those late night memories with my sister 🙂 (Note: These are made with Ezekiel bread english muffins, but you can totally just use regular Ezekiel bread instead. I did this for Dubs the other night and he absolutely loved it!)

Vegan English Muffin Pizzas
 
Prep time
Cook time
Total time
 
Serves: 1
Ingredients
Instructions
  1. Preheat the oven to 350 degrees F. Separate frozen english muffin so you have two halves. If it's tough to separate, just throw it in the microwave for 30 seconds to thaw and then try again.
  2. Once separated, place the two english muffin halves on the a baking tray and place in the oven for about 10 minutes.
  3. Take the tray out of the oven and spread 1 tbsp of tomato or marinara sauce on each half. Then put ¼ cup of the shredded vegan mozzarella cheese on each half. Put back in the oven for another 10 minutes until cheese starts to melt. You can also throw on broil for a minute at the end, but make sure you don't burn the english muffins!
  4. Let cool for a few minutes and then place on plate and divide arugula or leafy greens between the two halves. Enjoy!


Hoping this brings you back to some of your childhood memories that make you smile 🙂

With Health + Happiness Always,
Jax

PS – If you haven’t signed up yet for my FREE 3 Day Real Food Detox, do it — you will feel incredible after!

Watermelon Pesto Summer Salad

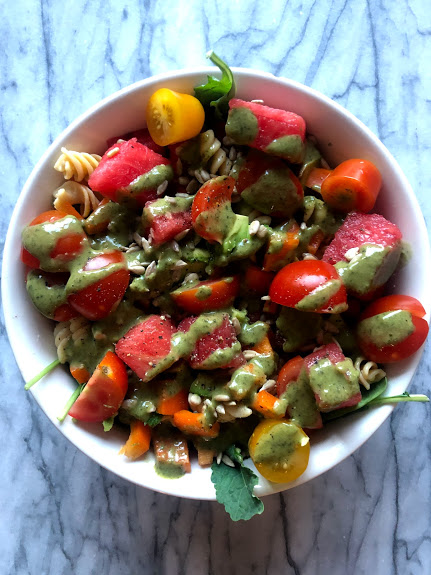
This salad has been on repeat for us all summer since it’s super refreshing + hydrating! Watermelon is definitely one of my favorite fruits and is made of 93% water – making it an excellent addition to your diet during the hot summer months. The recipe below is for 1 serving, but I would suggest multiplying the ingredients by 4-6x what the recipe says below if you to bring it to share at your next BBQ. Make sure to make it before the summer ends!

Watermelon Pesto Summer Salad
 
Prep time
Total time
 
Serves: 1
Ingredients
  • 1 handful baby kale
  • 1 handful baby spinach
  • ½ diced avocado
  • ¾ cup diced watermelon
  • ¼ cup diced orange pepper
  • 2 tbsp sunflower seeds
  • 6 halved cherry tomatoes
  • ½ cup banza pasta or ¼ cup brown rice/quinoa
  • 1-2 tbsp pesto sauce (just remove the avocado and double the amount of basil in this recipe)/pesto dressing
  • Optional black pepper to taste
Instructions
  1. In a larger bowl, add all ingredients and then top with black pepper and pesto sauce or dressing.
  2. Toss the ingredients together until the salad is well coated and either eat out of this bowl (to save on dishes!) or serve in a smaller bowl. Enjoy!


Want more tips on how to go plant based? Check out this blog post!

With Health + Happiness,
Jax

Vegan Bolognese Sauce

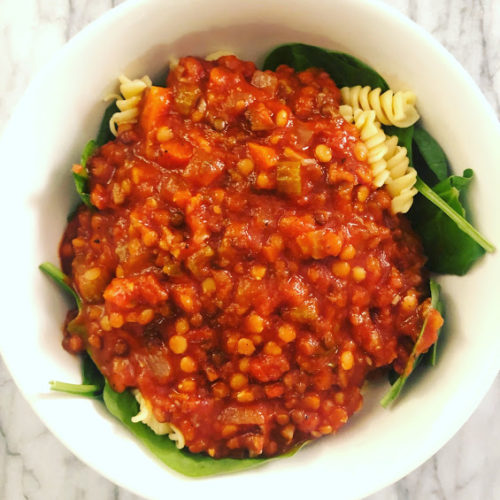
As I’m only 6 months into being a dairy-free pescatarian with eggs (I know I’m complicated!), it took me a little while to get used to not having meat sauce on my zoodles or chickpea pasta. Of course in “Little Adapts” fashion, I was determined to make my own vegetarian “meat” sauce so that I could enjoy a home cooked, hearty bowl of pasta that would make me + my clients happy 🙂 It’s great to make a batch and then freeze half of it for a rainy day when you don’t feel like cooking. Hint: the “meat” is legume + veggie based. Here’s what I came up with + hope you enjoy this as much as I do!


Vegan Bolognese Sauce
 
Prep time
Cook time
Total time
 
Serves: 6-8
Ingredients
Instructions
  1. In a large pot, heat the olive oil over medium-low heat. Add in onions and sauté until they start to brown. Once that happens, add in carrots, celery, + mushrooms. Turn up the heat to medium and allow the veggies to cook for 4 to 5 minutes until they start to soften.
  2. Add in garlic, pepper, bay leaves, thyme, oregano, cinnamon + nutmeg and stir. Allow the spices to cook into the veggies for about 1 to 2 minutes. Then add in tomato paste and stir that in for another 1 to 2 minutes.
  3. Add in tomato sauce, tomatoes with juice, veggie broth, water + lentils and stir. Bring everything to a boil and reduce heat to medium-low and simmer. Occasionally stirring so everything doesn’t stick to the bottom of the pot for about 15-20 minutes.
  4. Add in coconut oil + dried parsley and bring the heat down to low and cover the pot with a lid. Let it simmer and continue to stir occasionally for another 1 to 1.5 hours. Throughout this time, please taste the sauce to see if you would like to add any more spices and make sure that the lentils are softening.
  5. Remove bay leaves before serving and serve over Banza pasta, zoodles, or spaghetti squash. Option to add raw greens to the bottom of the bowl for extra nutrients. Enjoy!


With Health + Happiness Always,
Jax

PS – If you need a new energy ball, check out my Matcha Race Day Energy Balls here! They are amaze-balls 🙂

Cauliflower + Broccoli Rice Burrito Bowl

I’ve been experimenting with grain-less meals recently as there are so many theories out there about how grains are inflammatory. While I do believe whole grains are definitely needed in our diets as they are a great source of protein for vegetarians + vegans and fuel for the brain, I think we tend to over do them. They are also particularly useful for athletes and runners as a slow release of fuel while training or working out. I have found that we use them to fill our plates or as snacks when again they are only meant to add nutrients and texture to the meal versus being the star of the show. As I’ve always said, your plate should always be 3/4 greens + veggies and the whole grains + protein should be the other 1/4. Like I do with all theories, I test them out on myself to see how I feel and see how they fit into the “little adapts” philosophy. I will keep you posted as I experiment more, but this chipotle burrito bowl made with cauliflower + broccoli rice is definitely filling even without the whole grains + meat. Cinco de Mayo is coming up and you’re going to want to make this one 🙂

Cauliflower + Broccoli Burrito Bowl
 
Prep time
Cook time
Total time
 
Serves: 2
Ingredients
  • 2 tbsp avocado oil
  • ⅓ of a white onion diced
  • ⅔ of yellow pepper diced
  • 1 cup frozen or fresh cauliflower rice
  • 1 cup frozen or fresh broccoli rice
  • ½ cup halved cherry tomatoes
  • 1 tsp chipotle seasoning (sub cayenne, paprika, etc. combo)
  • Black pepper to taste
  • 1 can black beans drained and rinsed
  • 4 tbsp guacamole or 1 whole avocado sliced
  • 2 handfuls of leafy greens of your choice
Instructions
  1. Dice onion + yellow pepper. Heat a pan on medium-low heat + once heated, add in avocado oil.
  2. Add in onions, yellow pepper and black pepper to the pan. Sauté until the onions start to turn golden brown.
  3. Add in the cauliflower + broccoli rice along with the chipotle seasoning. (Note: You can make your own cauliflower rice by washing + cutting the head into florets and then throwing into the food processor to create "rice" size pieces. The same thing can be done with the stems of the broccoli. You can wash + chop up the stems of the broccoli and throw into a food processor.)
  4. Mix ingredients well and bring down to low heat. Cook for about 5 to 7minutes until all the flavors have been absorbed. Make sure to stir periodically.
  5. Add in halved cherry tomatoes + black beans and stir. Then cover and cook for another 5 minutes and continuing to stir.
  6. Turn off the heat and uncover + allow to cool for a few minutes.
  7. Place 1 handful of greens into the bottom of each bowl. (Note: This recipe makes 2 servings, but you can save the mixture for lunch or dinner the next day if you're only making 1 bowl. Easy meal prep!)
  8. Once the "rice" mixture is cooled, add about ½ into each bowl and top with 2 tbsp of guacamole or ½ an avocado sliced.
  9. Enjoy this vegan bowl!


With Health + Happiness Always,
Jax

PS – Love avocado? Try this avocado based smoothie recipe here.


Herb Olive Oil Cauliflower Steaks

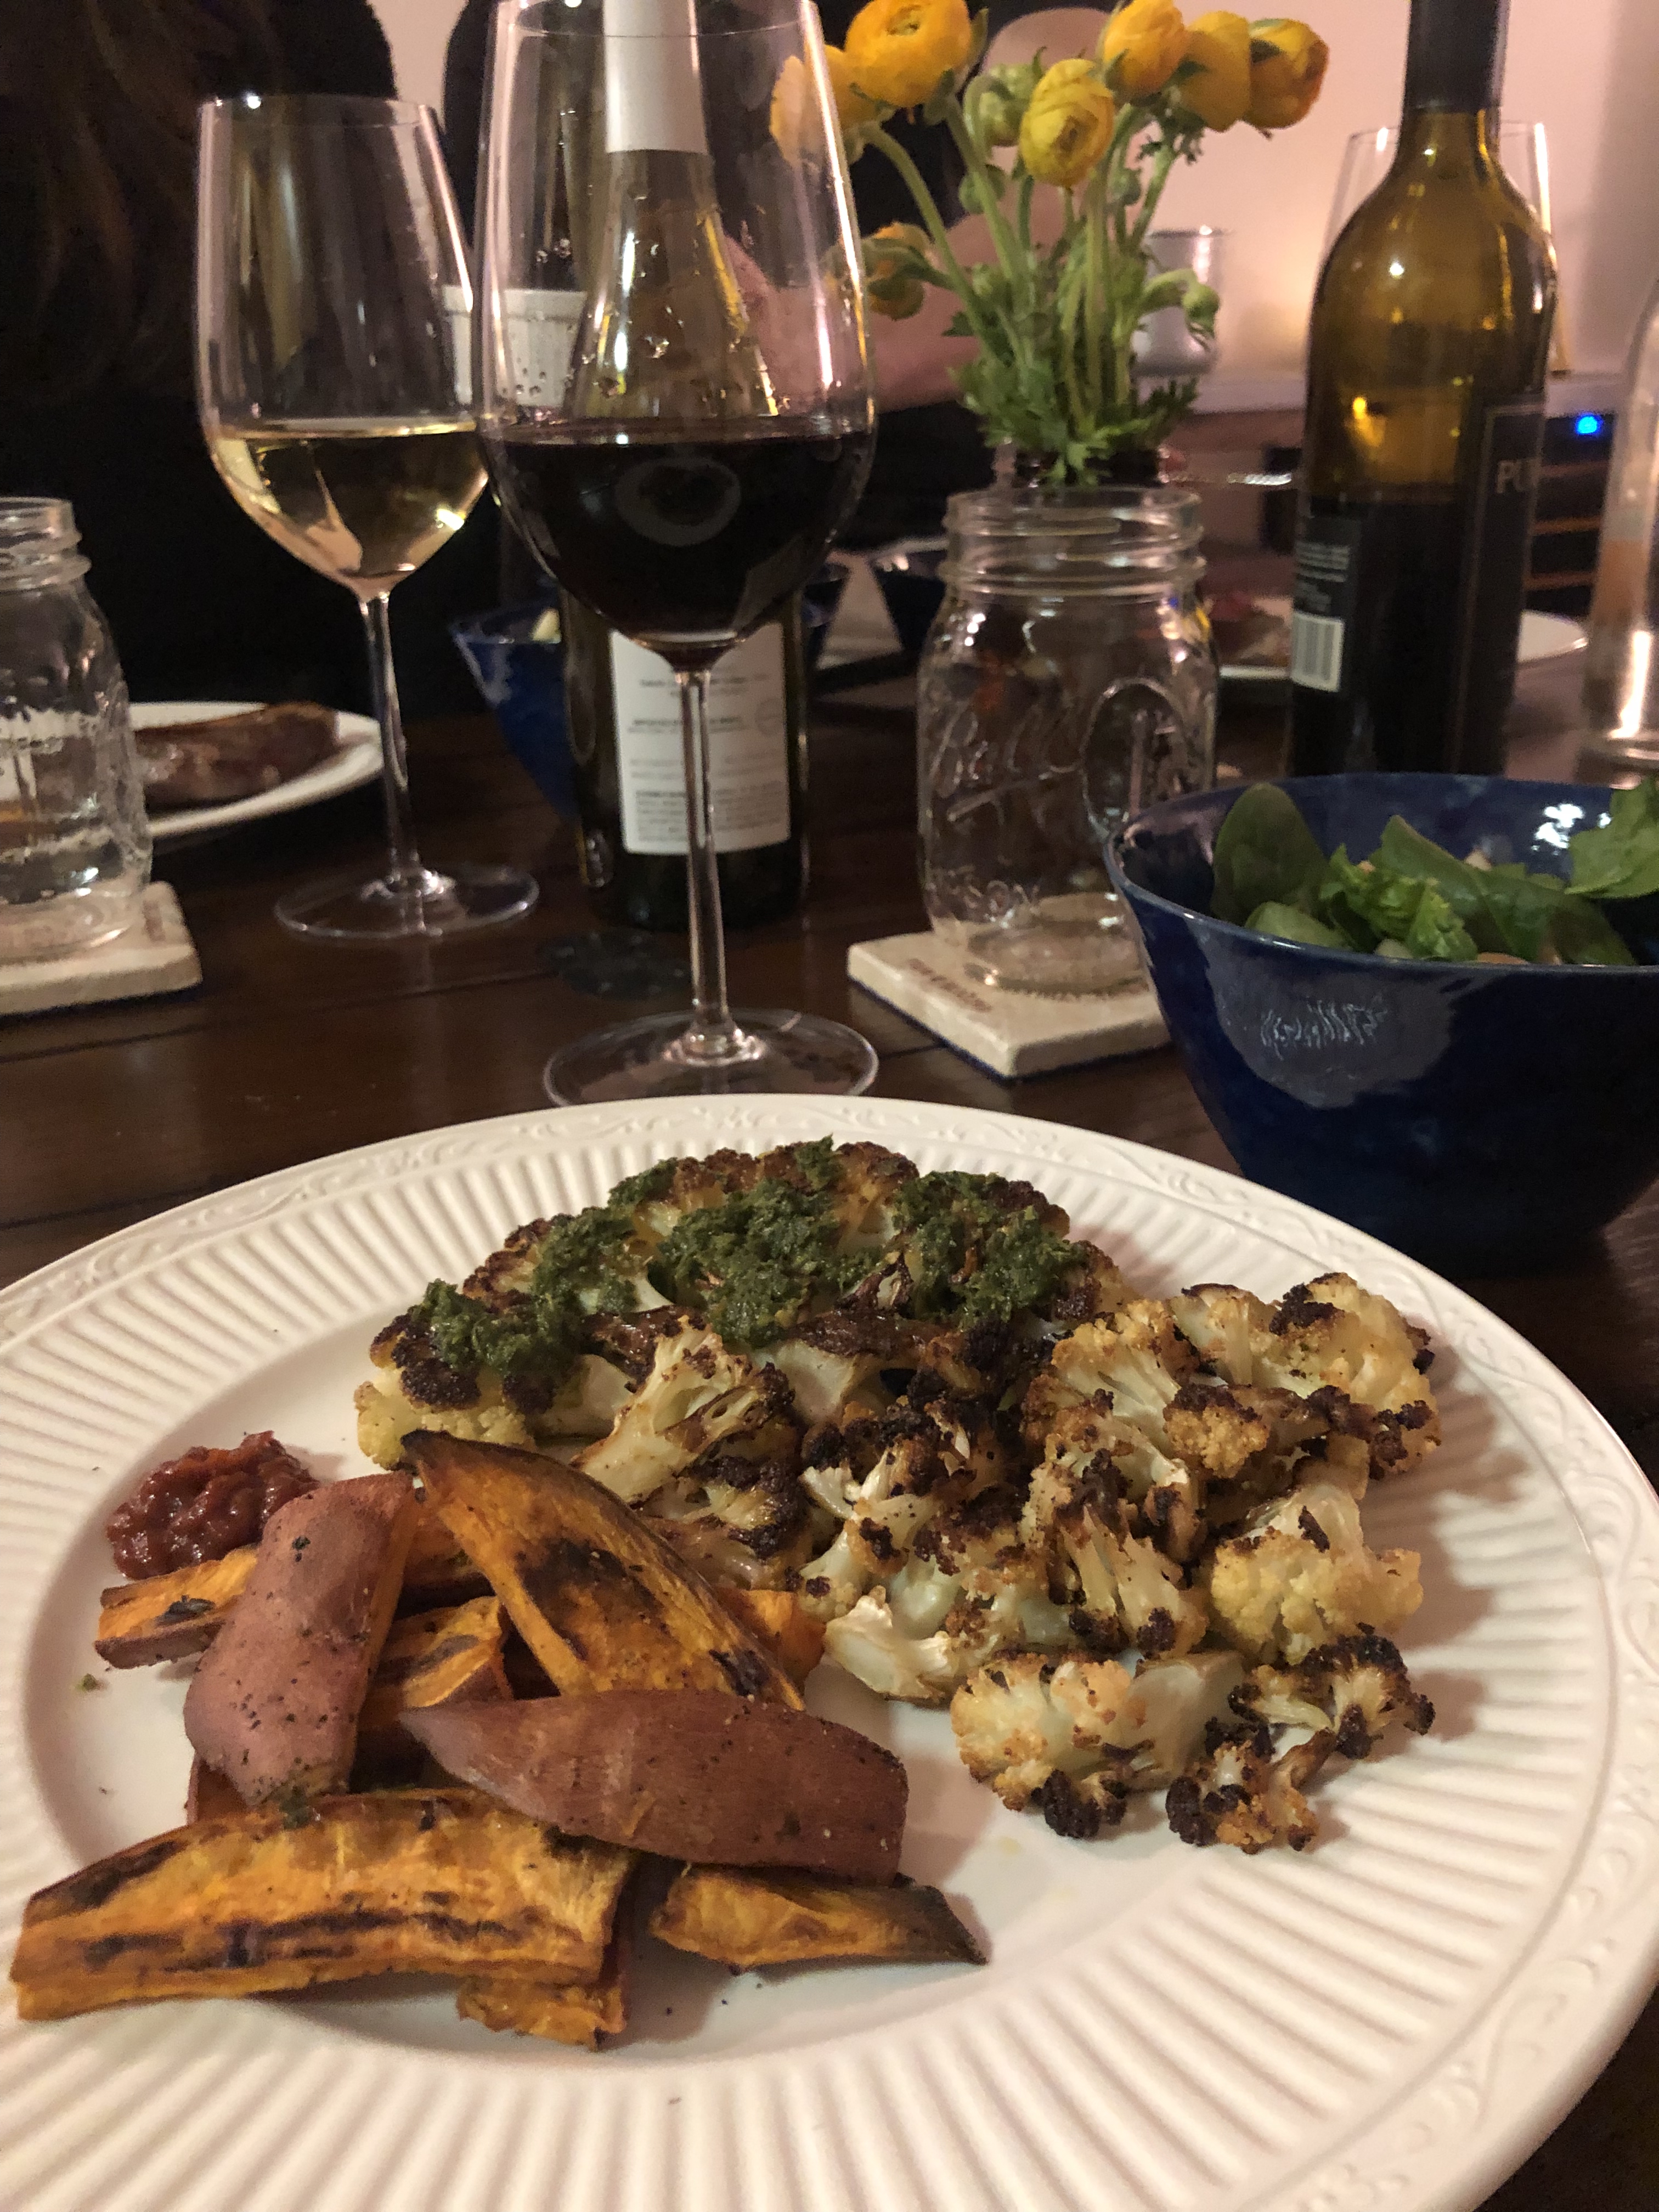
Recently, we had friends over for dinner and I didn’t want to force them to eat vegetarian if that’s not their thing. I respect that everyone has different tastes + dietary needs so I won’t force you to eat vegetarian, but I will include a lot of healthy plant based sides to the meal. So I decided that we would still get them steak, but I would try making “cauliflower steaks” for Dubs and I. The recipe came out amazing! Then I made them again last night (btw when you’re our family we expect you to eat more plants!) and they came out just as good if not better. I was asked for the recipe on both occasions so that’s when you know you have a gem 🙂 These are super easy to prep and if you are looking for more “meatless meals”, this is a perfect one to try. Note: You can cook at a higher temp for less time as per the recipe, but if you are cooking other veggies and not in a rush – then 350 degrees F works just fine. Enjoy!!!

Herb Olive Oil Cauliflower Steaks
 
Prep time
Cook time
Total time
 
Serves: 4
Ingredients
Instructions
  1. Preheat the oven to 350 degrees F. (You can go upwards of 500 degrees F if you want to expedite the steaks as cooking only takes 25 minutes then instead of an hour, but 350 degrees F is best if you are cooking other veggies in the oven!)
  2. Cut off stems and leaves of both heads of cauliflower and then rinse with water + pat dry. Make sure you don't cut too much of the stem/core off the cauliflower or the "steaks" will fall apart!
  3. Slice each cauliflower in half down the middle and then cut 1 to 1.5 inch "steaks". You will get about 4 steaks give or take. Don't worry if small florets fall off as you can still throw them on the baking tray anyways.
  4. In a small bowl, add olive oil + spices and whisk together. Then using a basting brush, brush the marinade on both sides of the cauliflower steak (+ any separate florets) and place on a baking pan. If you don't have a basting brush, you can just drizzle it on.
  5. Cover the baking pan tightly with foil, and place in the oven on the bottom rack. Bake with the foil on for about 15 minutes to steam the cauliflower.
  6. Take off the foil and continue to bake for another 45 minutes. You will need to carefully flip the cauliflower steaks halfway through to make sure each side gets nice and brown. Option to broil for the last few minutes if you like your steak extra crispy!
  7. Serve with greens, more veggies (like these sweet potato fries), and drizzle with chimichurri or avocado pesto sauce. This chimichurri sauce you can buy at Whole Foods!


With Health + Happiness,

Jax

PS – Want to try 12 days of plant based eating, have lots of energy + lose weight before summer? Click here ASAP to sign up for the “12 Day Real Food Reboot” Program that starts on Monday, April 22nd!

Vegan BBQ Pulled Jackfruit

After going vegetarian this year and requests for more “plant based” healthy eating recipes, I decided to experiment with jackfruit as I’ve read a lot about it + have tasted it’s “pulled pork” like texture. Most recipes I saw call for canned jackfruit in water (not brine), but unfortunately I could only find the frozen jackfruit in the freezer section of Whole Foods. However, both my husband and I love this BBQ pulled jackfruit recipe as it’s easy to make in about 30 minutes and can easily be added to bowls, plates, tacos + my new fave TAQUITOS! (Don’t worry – I will be posting how to make the perfect taquito later this month!) The best part is that it’s packed with the following nutrients:

  • Magnesium
  • Vitamin B6
  • Vitamin C
  • Potassium

These nutrients aid in boosting immunity, increasing magnesium levels + aiding in digestion. If you are looking to experiment with more veggie protein sources and love some good ol’ BBQ flavor, then this recipe is for you 🙂 This definitely won’t be the last jackfruit recipe either so stay tuned…


Vegan Pulled BBQ Jackfruit
 
Prep time
Cook time
Total time
 
Serves: 5-6
Ingredients
Instructions
  1. Once jackfruit is defrosted, rinse + drain the jackfruit under cold water and let dry while you prepare other ingredients.
  2. Heat a pan on medium-low to low heat and dice half of a white onion.
  3. Add avocado oil, black pepper + white onion to the pan and sauté for about 3 to 5 minutes until onions turn a light brown.
  4. Drain + rinse cannellini beans and set aside to dry for later.
  5. Then add in dried jackfruit and stir into oil + onion mixture. Cover and continue to stir for 10 minutes or so until jackfruit becomes tender enough to shred.
  6. Using 2 forks, shred jackfruit into strips in the pan until you have a "pulled pork" type texture.
  7. Turn heat to a low/simmer + add in water, BBQ sauce + beans. Stir, cover and let simmer for another 10 minutes or so until the jackfruit has absorbed the BBQ flavor.
  8. Serve over lots of green + veggies or in tacos/taquitos. Enjoy!


With Health + Happiness Always,

Jax

PS – Are you looking to cleanse before the summer starts?! If so, the “12 Day Real Food Reboot” Program is back + launching on April 22nd. Click here for more info + to sign up today to get the early bird special!

Egg Salad Spinach Bowl

So I have a confession to make…my favorite type of salad until this year was hands down CHICKEN SALAD. I mean I’ve tried lots of it and made it at home from time to time so this is a big change for me. Just like everything else, it’s totally worth it for my health 🙂 Since I’ve decided to go vegetarian (only eating seafood + eggs), I’ve had to mix it up so creating a healthy egg salad recipe was on the top of my list. In all honesty, this egg salad was delicious + much easier to make than chicken salad. If you want an easy + convenient way to add protein to your plate/bowl/toast, this one is a keeper. This recipe includes how to make it over spinach salad as well. Like I always say, eating healthy doesn’t have to be hard or complicated but it can definitely be delicious!

PS – Don’t worry vegans my next salad to recipe test is chickpea salad (who knows maybe one day I’ll just go vegan 😉 )!

Egg Salad Spinach Bowl
 
Prep time
Total time
 
Serves: 4-5
Ingredients
Egg Salad
Egg Salad Spinach Salad Ingredients (Serves 1)
Instructions
Egg Salad
  1. Hard boil the eggs by placing eggs into a pot + cover with water by at least 1 inch.
  2. Bring the pot to a boil on medium-high heat and then cover the pot. Remove from the heat + allow the eggs to sit for 8 to 10 minutes.
  3. Drain + rinse with cold water and let cool for 5 to 10 minutes.
  4. Peel off the shells and then either mash or chop up hard boil eggs + place in a medium bowl.
  5. Add in mayo, honey mustard, sea salt + pepper and mix until well combined.
  6. Enjoy over salad, plain, with crackers, or on toast!
Egg Salad Spinach Bowl
  1. Place spinach, cabbage, tomatoes, cucumbers in a bowl.
  2. Top with egg salad + drizzle of honey mustard.
  3. Makes a bowl for 1 - enjoy!


For more vegetarian healthy eating recipes for lunch + dinner, click here!

With Health + Happiness,
Jax

Warm Vegan Curry Dish

With all of this cold weather, I’ve craving warm + veggie heavy meals (especially with the start of the “12 Day Real Food Reboot” yesterday!) This healthy eating recipe is easy to make + can be made with whatever assortment of vegetables you have on hand in the fridge. It also contains turmeric which is a powerful anti-inflammatory root that I use daily in my diet. If you love curry, you will love this dish!

Warm Vegan Veggie Curry Dish
 
Prep time
Cook time
Total time
 
Author:
Serves: 4
Ingredients
Instructions
  1. Preheat oven to 400 degrees F.
  2. Cook brown rice according to the package.
  3. Heat up a large skillet on low heat and add coconut oil, minced garlic, diced onion, curry powder, ginger, and turmeric. Mix together and heat for a few minutes until combined and onions start to become translucent.
  4. Then add in coconut milk and water, and bring to a boil.
  5. Add the veggies, greens, cauliflower rice + lentils and bring the heat to a simmer. Cover the skillet and simmer for about 30-35 minutes. Make sure to stir periodically + taste test to see if you need any additional spice.
  6. Serve over brown rice + enjoy!


Vegan Butternut Squash Soup

Another fall favorite: butternut squash! While I am always looking to eat real food, I also like to incorporate what is seasonally available in my diet. Last week, I bought this butternut squash as I wanted to make my own vegan, gluten-free version of one of my favorite soups. This soup is super light and creamy and is perfect to have over greens and sprinkled with nuts and/or seeds or the addition to any meal as a side soup. Hope you love it as much as I do and don’t forget to tag me if you make it!

Vegan Butternut Squash Soup
 
Prep time
Cook time
Total time
 
Author:
Serves: 8-10
Ingredients
Instructions
  1. Pre-heat the oven to 400 degrees F. Cut the butternut squash in half and scoop out the seeds. Drizzle 2 tbsp of coconut oil and black pepper on the squash. Place them face down on a baking pan and bake for 45-50 minutes.
  2. While the butternut squash bakes, dice the red onion (or any onion you have on hand!)
  3. Once the butternut squash is done (should be easy to put a fork in it), take it out and let it cool for 15 minutes.
  4. In a large pot, put 2 tbsp of coconut oil and heat it on medium-low heat. Once it is heated, throw in the onion, minced garlic, black pepper, and a dash of sea salt. Lower the heat and simmer for 5-10 minutes.
  5. Then add both cans of coconut milk and scoop out the flesh of the butternut squash from the skin and mix in the pot and increase slightly to simmer.
  6. Add in the spices as well as black pepper to taste. Continue to stir and heat for another 5 minutes.
  7. Pour the contents into a 64 oz Vitamix container or half into a food processor (you'll need to do 2 batches) to purée until you have a smooth consistency.
  8. Serve over greens and sprinkle pumpkin seeds + hemp hearts for some added protein and texture. Enjoy!
  9. Store in the fridge for up to a week, or cool and freeze for later.


Â